Discoverable Search Feature Overview
Overview
By default, the only content that appears for a user in Digital Hive is the content that the user would see if they logged into the BI system(s) as themselves. In other words, Digital Hive will not expose content to a user that they are not already permitted to see. While this level of access security is desirable to most organizations, there are some companies that want to promote self-service. In this scenario, users would see that content exists, even if they don't have access to it, but will not be able to execute the report or dashboard.
The premise, is that if a user requires access to a report, but can't see that it exists, how would they ever know to request access? Or even worse, if they are not aware of the existence of the report, they may be inclined to create a new version of the report, needlessly adding to the ever growing list of reporting assets, or they may submit a helpdesk ticket to have a new report creating. Again, not only adding to the list of reporting assets, but also adding to the IT backlog.
When a user browses content, all items that they don't have access to appear with a lock icon. In the image below, this user has access to the Digital Hive PowerBI workspace (blue folder) but does not have access to the Office of CTO workspace.
Even though the user doesn't have access to the Office of CTO workspace, if the user drills into the Office of CTO, all content within will show with a lock icon as well (if the user doesn't have access to that content either). This is because the workspace is NOT executable, so the user can drill into objects below the workspace.
Drilling into the workspace exposes the Dashboards and Reports folders, which the user does not have access to so the lock icon is displayed. Drilling into the Reports folder will expose the contents for that folder.
When a user clicks on the Digital Hive Salesforce report, because it's a launchable object, the user will not be able to run the report. Instead, a customizable message will appear, similar to the following image.
Similar to the browsing experience, the locked items appear in the search results when a user performs a search.
Included in the 2024.2 release is a new facet type, called Access, that allows a user to filter out objects based on whether they currently have access to the content. For example, using the previous search results, a user wants to see just the content that they currently don't have access to, so they select the Locked facet, and the search results are refined.

If report names contain sensitive information, like a report called Next Quarter Layoffs for example, consider renaming the report before enabling the Discoverable Search feature without creating some visibility rules. Although users won't be able to execute the Next Quarter Layoffs report, because they don't have access to it, without visibility rules they will be able to see that the reports exist and could assume that layoffs are imminent. More about visibility rules in the next section.
Enabling Discoverable Search

In version 2024.2, a mechanism was added that will display all Digital Hive content that have been indexed, regardless of access permissions that a user has to the content. This is no longer required as of version 2025.2. Here are the steps to enable the feature:
- In Services, stop Digital Hive - node1
- In File explorer, navigate to DigitalHive\app\node1\tomcat\conf
- Edit theia.properties in a text editor
- Change the elasticsearch.security.filter=true to elasticsearch.security.filter=false which will enable Discoverable Search
- Change the elasticsearch.security.noAccessMessage=No access by replacing 'No access' with a value that will be shown to users when they try to access locked content.
- Save the changes to the theia.properties file
- In Services, start Digital Hive - node1
Starting in the Digital Hive 2025.2 release, enabling the Discoverable Search feature is done through the Control Center UI. Located under Content, the Discoverable Search tab controls not only whether the feature is enabled or not, it also enables administrators to control which 'locked' content is visible, or not visible, to users.
By default, as shown above, the Hide inaccessible items is selected, which means that the Discoverable Search feature is disabled. To enable Discoverable Search, select the Show inaccessible as locked radio button. Once enabled, ALL content that a user does not have access to will be displayed through the Digital Hive UI and will appear with the locked icon. Restarting the Digital Hive server is not required for this change to take affect.
The third option, Selectively show inaccessible items allows administrators to create rules that influence which inaccessible items are visible to users. In the earlier example about the report named Next Quarter Layoffs a visibility rule could be created that suppressed any report that contains the word 'layoff' in the title or description. To accomplish this:
- Log into Digital Hive as an administrator
- Using the user avatar, select the Manage Digital Hive option
- Expand Content and select Discoverable Search
- Select the Selectively show inaccessible option
- This will launch the Create new rule wizard
- To suppress the word layoff, we'll set the Rule type to Exclude matches from being found
- The Search query field is where the search criteria to be excluded is specified. Enter the word layoff in this field
- Because we want to ensure that any content containing the word layoff is suppressed from non authorized users, the Search inside... scope will be left at Everything, which means all content systems
- There is no need to apply any Filters at this time
- Press Save
The Discoverable Search UI will then update to reflect the new rule and that the Selectively show inaccessible option is enabled.
It is possible to configure multiple rules to further refine the 'locked' content that is available to non authorized users. For example, there may be a lot of content that is outdated or in various stages of development. Leveraging the Digital Hive Custom Fields feature, usable content can be marked as 'certified'. A rule could be created that filters out anything pertaining to layoffs, and then a rule could added that only shows content that has been flagged as 'certified'.
- Press the Create new rule icon
- To allow only certified content set the Rule type to Allow matches to be found
- The Search query field can be left blank as Custom Field values will be used to filter the content
- Because we want all 'certified' content to be shown, the Search inside... scope will be left at Everything, which means all content systems
- Click on the Filters field
- In the list of options will be the filers that are similar to those on the Search results page: kind, content system, metadata tags, ratings, and custom field values. Scroll until the 'certified = yes' field is located and then select that option. Note: the orange icon appears in this example because the Visual Cues feature has been enabled
- Press Save
The Discoverable Search UI will update to reflect the newly added rule. After a rule has been created it can be edited or deleted using the corresponding actions menu.
The end result is that Discoverable Search has been enabled, any content that contains the word 'layoff' will be excluded and hidden from unauthorized end users, and only content that is certified will be displayed.
Customizing the 'no access' message
When a user clicks on a 'locked' item 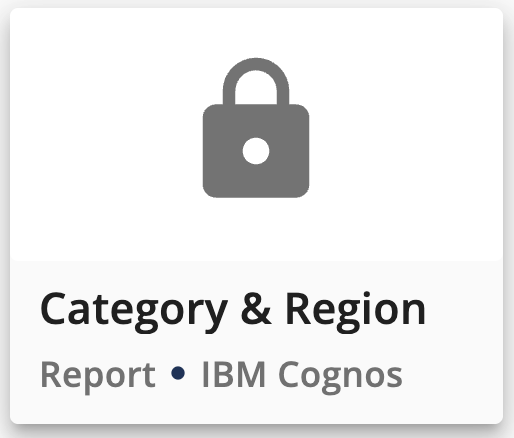 a pop-up will appear that, by default, will state You don't have access to Category & Region. The message that is displayed can be controlled globally, or at the individual system connector level. These messages are great for indicating to users how to request access to a 'locked' piece of content. It could be a contact name, email address, and/or phone number. Or it could be a url link to an internal ticketing system. In either case, providing users with an action to take allows them to further the process of getting access to the locked report.
To set the global message.
- Open the Discoverable Search page within the Control Center
- Click on the Edit default 'no access' message icon
- The Set the default 'no access' message template dialog is where a global default message will be created. To provide more flexibility, the ability to include variables for the report name and who the author is are available. In this example, For access to {{name}} please contact {{author}}. is the default message that is required
- Press Save
When a user tries to launch a locked item, 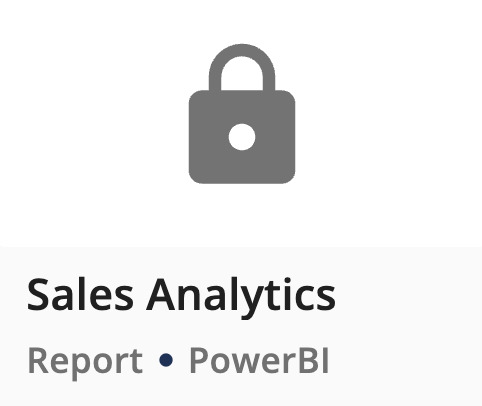 this is the message that will be displayed.
Some scenarios may require that a different message be displayed based on the individual content system. For example, the point of contact isn't the author name, it may be a specific group within the organization, and there are different groups assigned to each content system. In addition to a default global message, it is possible to create unique 'no access' message for each connector.
- Launch the Control Center
- Click on Content which will show you the list of Connectors
- Locate the desired connector and click on the vertical ellipsis
- Select Edit default 'no access' message
- Provide a default message for the connector type
- Press Save
- Repeat steps 3-6 for the other connectors
Configuring unique 'no access' messages for each connector provides users with additional guidance about their next steps to gaining access to the required content. When a user tries to access an unavailable report from Cognos, they're presented with a similar message, pointing them in the direction of the Cognos team.
When a user access a locked view from Tableau Cloud, the message instructs them to contact a different group responsible for Tableau Cloud.
Related Articles
Digital Hive Architecture Overview
Overview Digital Hive is a lightweight, web-based application that is both easy to install as well as to maintain and manage. Other than the Microsoft C++ redistributable (https://www.microsoft.com/en-ca/download/details.aspx?id=40784), there are no ...What's New in the 2024.2 Digital Hive Release
This articles details the new product features, enhancements, and resolved issues, that were included as part of the Digital Hive 2024.2 release. New Features & Enhancements Control Center - Search tab Search is a very powerful use case within ...What's New in the 2025.2 Digital Hive Release
What's New in the Digital Hive 2025.2 Release This articles details the new product features, enhancements, and resolved issues, that were included as part of the Digital Hive 2025.2 release. Prerequisites To move to this release, this must be a new ...Search Management Interface
Getting to the Search Management Interface 1. Click the user avatar and select Manage Digital Hive 2. Within the Control Center expand Content then click Search 3. Here you will find the new search and indexing features to better manage indices ...Digital Hive Installation and Configuration Overview
Overview This article serves as a collection of all the steps required to install and configure the Digital Hive solution. Prerequisites Digital Hive can be installed on either Windows or Linux based systems. From a server sizing perspective, the ...